WordPress & PHP 5.5.x Migration Guide for Digital Ocean
How to Migrate an Old WordPress Site to a New DigitalOcean Droplet with Caddy
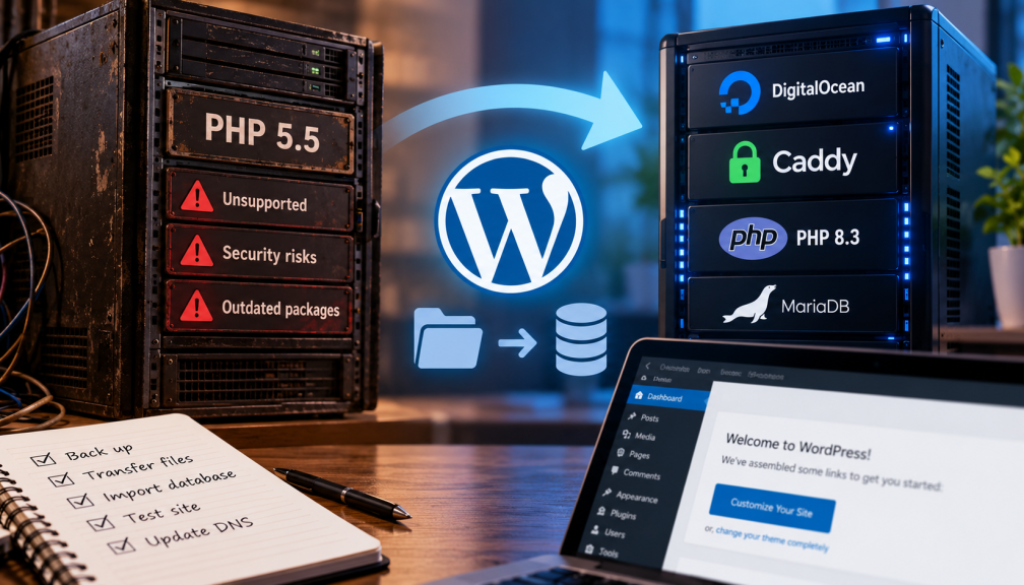
If your WordPress website is still running PHP 5.5 or an even older version, migrating to a new server is a practical way to improve security, modernize your hosting environment, and avoid trying to upgrade a decade-old server in place.
This guide walks through migrating a single-site WordPress installation from an old DigitalOcean Droplet to a new Droplet running a supported PHP version and Caddy web server. It is intended for site owners who are comfortable following server commands but may not be familiar with modern WordPress hosting.
You do not need to preserve your existing operating system or web server configuration. Instead, you’ll build a clean server, transfer your website, test it, and then direct your domain to the new Droplet.
Why migrate now?
On October 21, 2026, WordPress published a security advisory concerning two critical vulnerabilities addressed by a new PHP security release. The advisory warns that PHP versions before 8.2 no longer receive security updates from the PHP project and recommends updating PHP as soon as possible. It also advises administrators of vulnerable systems to consider taking them offline while preparing an upgrade if immediate remediation is not feasible.
See the official WordPress security advisory.
PHP 5.5 has been unsupported for years. Even if your website appears to work normally, its PHP runtime and possibly its operating system, WordPress core, plugins, and themes may have known security vulnerabilities.
Migrating to a new Droplet provides several advantages:
A new server does not automatically make an old WordPress application secure. The application, database, themes, plugins, and administrative accounts must also be reviewed.
Overview of the migration
-
-
Inspect the old server and identify the WordPress installation.
-
Back up the old Droplet, website files, and database.
-
Create a new DigitalOcean Droplet.
-
Install Caddy, PHP-FPM, and a database server.
-
Transfer the website and import the database.
-
Test the site before changing DNS.
-
Switch the domain to the new Droplet.
-
Verify the site and retire the old server only when it is safe to do so.
-
Important: Keep the old Droplet running until the new site has been tested thoroughly. A migration should be reversible for as long as practical.
1. Inspect the existing WordPress installation
Before making changes, identify the basic details of the existing server.
Connect to your old Droplet using SSH:
ssh your-user@OLD_SERVER_IP
Replace your-user with your SSH username and OLD_SERVER_IP with the old Droplet’s public IP address.
Check the operating system and PHP version:
    cat /etc/os-release
php -v
Identify which web server and database services are running:
ps aux | grep -E 'apache2|httpd|nginx|mysql|mariadb'
These commands are for discovery only. Do not attempt to upgrade the old operating system or replace its PHP installation as part of this guide.
Locate your WordPress files
Common WordPress directories include:
    /var/www/html
/var/www/example.com
/usr/share/nginx/html
Your installation may be somewhere else. Look for the directory containing wp-config.php, wp-admin, wp-content, and wp-includes.
For example:
ls -la /var/www/html
Once you locate the WordPress directory, record its absolute path. The rest of this guide refers to that location as OLD_WP_ROOT.
Identify the database
Open wp-config.php and locate the database settings:
    define( 'DB_NAME', 'database_name' );
define( 'DB_USER', 'database_user' );
define( 'DB_PASSWORD', 'database_password' );
define( 'DB_HOST', 'localhost' );
Your actual values will differ.
Record the database name, database username, database host, and WordPress table prefix. Do not publish or share your database password.
Also record:
-
Your site’s primary domain and any
wwwvariant. -
Whether the site currently uses HTTP or HTTPS.
-
The WordPress version.
-
The active theme and plugins.
-
Whether the site uses custom code or other applications alongside WordPress.
-
Any scheduled jobs, external integrations, SMTP settings, or caching services that might need to be recreated.
You can check the WordPress version in the dashboard under Dashboard → Updates, or by examining the WordPress files.
Check for compatibility concerns
The new server will use modern PHP, so old themes and plugins may not work without updates.
Make a list of any plugin or theme that is no longer maintained, is licensed through an external vendor, or requires a particular PHP version. Keep copies of custom code and licensed theme or plugin packages.
Do not assume that an old plugin will become compatible merely because the server has been migrated.
2. Back up the old Droplet, files, and database
A successful migration starts with a backup you can actually restore.
Create a DigitalOcean snapshot
In the DigitalOcean control panel, create a snapshot of the old Droplet.
A snapshot gives you a recovery point for the server’s disk, but it should not be your only backup. Keep a separate copy of the WordPress files and database, preferably somewhere other than the old Droplet.
If you suspect that the server has already been compromised, treat the snapshot as a recovery reference, not as a clean server image to deploy elsewhere.
Export the WordPress database
Use the database credentials from wp-config.php.
For a typical MySQL or MariaDB installation, run:
    mysqldump -u database_user -p \
  --single-transaction \
  database_name > wordpress-backup.sql
Replace database_user and database_name with the real values. Enter the password when prompted.
The --single-transaction option is useful when the tables use InnoDB because it provides a consistent transactional export without requiring a full table lock. If your database contains nontransactional tables, you may need a maintenance window or a different backup strategy.
Check that the file exists and is not empty:
ls -lh wordpress-backup.sql
For additional assurance, inspect the beginning and end of the SQL dump:
    head -n 20 wordpress-backup.sql
tail -n 20 wordpress-backup.sql
Store the database export securely. It contains your site’s content and potentially sensitive information.
Back up the WordPress files
Copy the entire WordPress installation to a backup location. For example:
    tar -czf wordpress-files-backup.tar.gz \
  -C /var/www/html .
In this example, /var/www/html is the WordPress root. Replace it with the actual path.
This archive preserves the old installation, including custom code, themes, plugins, uploaded media, and configuration files. It is a recovery artifact; you do not necessarily want to run the old WordPress core files on the new server.
If your site has uploads or other files stored outside the WordPress directory, back those up separately.
Transfer the backups off the old server
From your local computer, you can download the backup files using scp:
    scp your-user@OLD_SERVER_IP:/path/to/wordpress-backup.sql .
scp your-user@OLD_SERVER_IP:/path/to/wordpress-files-backup.tar.gz .
Alternatively, transfer them directly to the new Droplet once it is created.
Do not proceed until you have verified that the database export and file backup are available somewhere other than the old server.
3. Create a new DigitalOcean Droplet
In DigitalOcean, create a new Droplet using a currently supported Ubuntu LTS release available in your account.
Choose a size with enough memory and disk space for your site’s database, media library, PHP-FPM processes, and expected traffic. A modest WordPress site may run on a small Droplet, but large media libraries, resource-intensive plugins, or high traffic can require more capacity.
Do not select an obsolete image just to match the old server.
Configure access
Set up SSH-key authentication where possible. Keep a working administrative SSH session available while configuring the server.
DigitalOcean Cloud Firewalls can restrict inbound traffic. For a typical public WordPress site, allow:
| Port | Purpose | Access |
|---|---|---|
| 22/TCP | SSH administration | Your trusted IP addresses, if practical |
| 80/TCP | HTTP and certificate validation | Public |
| 443/TCP | HTTPS website traffic | Public |
Caddy needs public access to the relevant HTTP and HTTPS ports to serve the site and normally obtain and renew certificates. If you use IPv6, ensure your firewall and DNS configuration support it too.
Do not expose MySQL or MariaDB directly to the public internet. A local database connection is sufficient for this setup.
4. Install Caddy, PHP-FPM, and the database server
Connect to the new Droplet:
ssh your-user@NEW_SERVER_IP
Update the operating system packages:
    sudo apt update
sudo apt upgrade
Install a database server and the PHP extensions WordPress commonly needs:
    sudo apt install mariadb-server \
  php-fpm \
  php-mysql \
  php-curl \
  php-gd \
  php-mbstring \
  php-xml \
  php-zip \
  php-intl \
  php-bcmath \
  unzip
Package availability and PHP versions depend on the Ubuntu release and configured repositories. Check the installed PHP version:
php -v
Choose a PHP branch that is currently supported and compatible with your WordPress version, theme, and plugins. As of this article’s publication, PHP 8.4 and 8.5 are supported branches, but you should verify the current support status and the packages available for your chosen operating system. See PHP’s supported versions.
The php-fpm package provides the FastCGI Process Manager that Caddy will use to execute PHP scripts. The php-mysql extension allows PHP to communicate with MySQL or MariaDB.
If your site requires additional PHP extensions, install those too.
Install Caddy
Follow the official Caddy installation instructions for your operating system. On Ubuntu, use the official package repository instructions where appropriate.
Once installed, check that the service is running:
sudo systemctl status caddy
Check PHP-FPM as well:
systemctl list-units --type=service 'php*-fpm.service'
This helps identify the actual PHP-FPM service and version installed on your Droplet.
Identify the PHP-FPM socket
Caddy needs to know which PHP-FPM socket to use. On a typical Ubuntu installation, it may resemble:
/run/php/php8.4-fpm.sock
The exact version will vary. Check the available sockets:
ls -l /run/php/
Use the socket that corresponds to the PHP version you intend to run.
5. Create the WordPress directory and database
For this example, the new WordPress installation will live in:
/var/www/example.com
Replace example.com with your real domain.
Create the directory:
sudo mkdir -p /var/www/example.com
Create a database and user
Open the local MariaDB shell:
sudo mariadb
Create a database and a dedicated user:
    CREATE DATABASE wordpress
  CHARACTER SET utf8mb4
  COLLATE utf8mb4_unicode_ci;

CREATE USER 'wpuser'@'localhost'
  IDENTIFIED BY 'REPLACE_WITH_A_LONG_RANDOM_PASSWORD';

GRANT ALL PRIVILEGES ON wordpress.*
  TO 'wpuser'@'localhost';

FLUSH PRIVILEGES;
EXIT;
Use a unique, strong password. If you use a different database name or username, keep those values for your WordPress configuration.
The database user needs privileges on this WordPress database, not unrestricted administrative access to the entire database server.
Install a clean WordPress core
Download a fresh copy of WordPress from the official WordPress download page.
Extract it into the new site’s document root so the directory contains index.php, wp-admin, wp-content, and wp-includes.
For example, if you downloaded latest.zip into your current directory:
    unzip latest.zip
sudo cp -a wordpress/. /var/www/example.com/
Do not copy the old installation’s core files over the new WordPress core. The purpose of this step is to start with a current WordPress codebase rather than carry forward old core vulnerabilities.
Before restoring content, ensure the new WordPress version is compatible with the PHP version and the extensions you installed. A very old WordPress database and its extensions may need additional work to run correctly on a modern installation.
6. Transfer the website files and import the database
This is the stage where the old site’s content is restored.
Transfer the database export
Copy wordpress-backup.sql to the new Droplet. From your local computer, for example:
scp wordpress-backup.sql your-user@NEW_SERVER_IP:/tmp/
Import it into the new database:
sudo mariadb wordpress < /tmp/wordpress-backup.sql
This assumes the dump contains the original database’s table definitions and data, without statements that select or recreate a different database. If your export includes database-selection statements or other server-specific commands, inspect the dump and adjust the import procedure accordingly.
Check that tables were imported:
sudo mariadb wordpress -e "SHOW TABLES;"
Restore uploads, themes, plugins, and custom files
Do not blindly replace the new WordPress core with the old archive. Instead, restore the files that contain your site’s content and customizations.
At a minimum, you will normally need:
-
wp-content/uploads/— images, documents, and other media. -
wp-content/plugins/— plugins, subject to compatibility and security review. -
wp-content/themes/— themes and any custom theme code. -
Any additional custom files your site depends on.
For example, if you extracted the old archive into a temporary directory called /tmp/old-wordpress, you might copy the relevant content into the new installation:
    sudo rsync -a /tmp/old-wordpress/wp-content/uploads/ \
  /var/www/example.com/wp-content/uploads/
Repeat this process for themes and plugins as appropriate. Check paths before running rsync; a trailing slash determines whether the directory’s contents or the directory itself is copied.
If the old archive contains important files outside wp-content, review them individually. Do not restore obsolete server configuration files or untrusted PHP files merely because they were present in the old installation.
If you suspect the old site was compromised, review restored plugins, themes, uploads, and custom PHP code before exposing the new server to public traffic.
Configure wp-config.php
Use the new WordPress installation’s wp-config-sample.php as a starting point, or create wp-config.php from it.
Set the database constants to the values created earlier:
    define( 'DB_NAME', 'wordpress' );
define( 'DB_USER', 'wpuser' );
define( 'DB_PASSWORD', 'REPLACE_WITH_A_LONG_RANDOM_PASSWORD' );
define( 'DB_HOST', 'localhost' );
Preserve the original database table prefix if you imported the original database. For example, if the old tables use wp_, keep:
$table_prefix = 'wp_';
If the original installation uses a different prefix, use that prefix instead.
Generate fresh WordPress authentication salts and keys using the official WordPress secret-key service, and use them in wp-config.php. This will invalidate existing authentication cookies, so administrators may need to sign in again.
Review any additional constants or custom configuration from the old wp-config.php before deciding whether they are still needed. Do not copy the old configuration wholesale without understanding its settings.
Set file ownership and permissions
Caddy needs to read static files, and PHP-FPM needs appropriate access to WordPress files. On a typical Ubuntu installation, PHP-FPM runs as www-data.
A common starting point is:
    sudo chown -R www-data:www-data /var/www/example.com
sudo find /var/www/example.com -type d -exec chmod 755 {} \;
sudo find /var/www/example.com -type f -exec chmod 644 {} \;
These commands are suitable as a starting point for a conventional installation, but file ownership and write permissions should be tailored to your deployment and security model. Avoid making everything world-writable.
7. Configure Caddy for WordPress
Caddy’s php_fastcgi directive passes PHP requests to PHP-FPM, while file_server serves static content. Caddy can also automatically manage HTTPS certificates.
The official Caddyfile documentation includes a WordPress-compatible PHP-FPM configuration pattern.
Open the Caddy configuration:
sudo vim /etc/caddy/Caddyfile
Replace the example site block with a configuration for your domain:
    example.com, www.example.com {
    root * /var/www/example.com

    encode zstd gzip

    php_fastcgi unix//run/php/php8.4-fpm.sock

    file_server
}
Replace:
-
example.comandwww.example.comwith your actual hostnames. -
/var/www/example.comwith the actual WordPress document root. -
/run/php/php8.4-fpm.sockwith the socket corresponding to your installed PHP-FPM version.
Include only hostnames that you intend to serve and have configured in DNS. If you do not use the www hostname, you can omit it.
Validate and reload Caddy
Check the configuration:
sudo caddy validate --config /etc/caddy/Caddyfile
If validation succeeds, reload Caddy:
sudo systemctl reload caddy
Check its status and logs if anything goes wrong:
    sudo systemctl status caddy
sudo journalctl -u caddy -n 100 --no-pager
Caddy will normally obtain and renew certificates automatically when the domain resolves to the new server and the necessary network ports are reachable. You do not need to install a separate certificate-renewal cron job for the standard Caddy-managed certificate workflow.
Important: DNS must be correct for automatic HTTPS
Before expecting Caddy to obtain a certificate for your public domain, ensure that:
-
The domain’s A record points to the new Droplet’s public IPv4 address.
-
Any AAAA record points to a working IPv6 address on the new Droplet. Remove or correct a stale AAAA record if IPv6 is not configured.
-
Ports 80 and 443 are reachable.
-
No other service is occupying those ports in a way that prevents Caddy from serving the domain.
You can prepare the Caddy configuration before switching DNS. The next section explains how to test the site before making the public cutover.
8. Test WordPress before switching DNS
Do not assume the migration is complete just because the homepage loads.
First, verify that the PHP-FPM socket exists and that Caddy can communicate with PHP-FPM. If PHP requests fail, inspect the Caddy and PHP-FPM logs.
Then test the website’s content and functionality.
Test using a local hosts-file override
If you want to test the new Droplet using the real domain before changing public DNS, you can temporarily override DNS on your own computer.
On macOS or Linux, edit /etc/hosts with administrator privileges and add a line like:
NEW_SERVER_IP example.com www.example.com
Replace NEW_SERVER_IP with the new Droplet’s IP address. Include only the hostnames you want to test.
This override affects your computer, not the public DNS records. When you’re finished testing, remove the line.
If you use this approach, remember that HTTPS certificate issuance may still depend on public DNS and Caddy’s ability to validate the domain. A hosts-file override alone does not prove that public DNS or automatic certificate issuance is configured correctly.
Check the following:
-
-
Homepage and key landing pages.
-
Individual posts and pages.
-
Category and archive pages.
-
Navigation menus and internal links.
-
Search functionality, if used.
-
Contact forms and other interactive features.
-
-
-
Images and downloadable files.
-
CSS and JavaScript.
-
Fonts and other theme assets.
-
Any resources loaded from external domains.
-
-
-
Test several individual posts and pages.
-
Test custom post types and other routes, if applicable.
-
If you receive 404 errors, check the WordPress permalink settings and Caddy logs.
-
-
-
Sign in to
/wp-admin/. -
Open the dashboard and confirm that content appears.
-
Edit and preview a page.
-
Check the media library.
-
Confirm that the active theme and required plugins load without fatal errors.
-
-
-
Check for PHP warnings and fatal errors.
-
Test the functionality provided by your theme and plugins.
-
Confirm that scheduled tasks, email delivery, and external integrations work.
-
Verify that the site is not generating HTTP URLs for resources that should use HTTPS.
-
Update WordPress URLs if necessary
If the public domain is unchanged, you usually do not need to replace the site’s URLs in the database merely because the server IP changed.
If the old site used HTTP and the new site will use HTTPS, make sure the WordPress Address and Site Address use the correct https:// URLs. These settings are found under Settings → General when accessible.
If you cannot access the dashboard, WordPress documents alternative ways to change these settings in its migration guide.
If you need to change the domain itself, use a WordPress-aware search-and-replace procedure rather than a blind SQL replacement. Serialized database values can be damaged by a naive text substitution.
Do not make unnecessary URL changes if the existing values are already correct.
9. Switch DNS to the new Droplet
Once the new site is working, update the DNS records for your domain.
In the DNS provider’s control panel, update the A record for the root domain and, if used, the www hostname so they point to the new Droplet’s IP address. If the domain uses IPv6, update the AAAA record too.
If your DNS is managed by DigitalOcean, make these changes in its networking control panel. Otherwise, update the records at the authoritative DNS provider.
If practical, reduce the records’ TTL in advance of the migration to shorten the expected transition period. A lower TTL does not guarantee that every resolver will switch immediately; some clients may continue using cached answers.
Verify the public cutover
After changing DNS, test the site from a network that is not using your local hosts-file override.
-
-
The domain resolves to the new Droplet.
-
HTTPS works and the browser trusts the certificate.
-
The homepage and important URLs load.
-
WordPress administration is accessible.
-
Forms and other interactive features work.
-
Caddy is serving requests without unexpected errors.
-
You can check DNS resolution from a terminal with:
    dig +short example.com A
dig +short example.com AAAA
Replace example.com with your domain.
Check the certificate and HTTP response as well:
curl -I https://example.com/
If DNS has not fully propagated, test from multiple networks or use a DNS lookup service. Avoid repeatedly changing records in response to what may simply be cached DNS data.
10. Monitor the new server and secure the old one
For the first several days after the migration, monitor the site more closely than usual.
Check Caddy's logs:
sudo journalctl -u caddy -f
Check PHP-FPM logs through the system journal or the log files configured for your installed PHP version.
-
-
HTTP 500 responses and PHP fatal errors.
-
Missing images, stylesheets, or scripts.
-
Broken forms or email delivery.
-
Plugin or theme compatibility problems.
-
Unexpected redirects or canonical URL issues.
-
High CPU, memory, or disk usage.
-
Failed scheduled jobs or external integrations.
-
Keep the old Droplet and its backups available until you’re satisfied that the new site is functioning correctly. If the old site accepted comments, orders, registrations, or other user submissions during the transition, make sure you account for any data written to the old database after the initial export. A final synchronized migration or a planned maintenance window may be necessary to avoid losing those changes.
Once the new server is stable, remove the old Droplet from public service and retire it when you are confident that it is no longer needed. Do not leave an unsupported, vulnerable server running indefinitely just because the migration succeeded.
Common migration problems
The site displays a 502 or 504 error
A 502 often indicates that Caddy cannot communicate with PHP-FPM. Verify that the PHP-FPM service is running and that the socket in your Caddyfile matches the actual socket on disk.
    ls -l /run/php/
systemctl list-units --type=service 'php*-fpm.service'
Check Caddy’s logs for the specific connection error.
The homepage works, but individual pages return 404 errors
Check the WordPress permalink settings and confirm that the Caddy site block uses the correct document root and php_fastcgi directive. Also verify that the imported database contains the expected content.
The site loads, but the browser reports mixed content
Some pages may contain hardcoded HTTP URLs for images, scripts, stylesheets, or other assets. Inspect the browser console to identify the affected URLs. Correct them at their source, using a WordPress-aware database replacement process when appropriate.
The site produces PHP fatal errors
An old theme or plugin may be incompatible with the new PHP version. Check the PHP logs and identify the file and line that caused the error. Update, replace, or remove the incompatible component after taking a backup.
Do not solve compatibility problems by downgrading to an unsupported PHP version in production. If an essential plugin cannot run on a supported PHP release, you may need to replace it or arrange development work.
HTTPS certificates are not issued
Verify that the domain’s A and AAAA records are correct, that ports 80 and 443 are reachable, and that Caddy is running. An incorrect AAAA record can direct certificate-validation requests to an IPv6 server that is not serving the site.
WordPress cannot write uploads or update plugins
Check the directory ownership and permissions, particularly under wp-content/uploads. Ensure that PHP-FPM has the necessary access without making the entire WordPress tree world-writable. The correct permissions depend on your deployment model.
Final migration checklist
| Before considering the migration complete, confirm each item: |
|---|
| The old Droplet has a snapshot and separate backups of the database and files. |
| The new Droplet runs a supported operating system and PHP release. |
| WordPress core is current and the database has been imported. |
| Required themes, plugins, uploads, and custom code have been restored and reviewed. |
| wp-config.php points to the correct database and uses appropriate secrets. |
| Caddy serves the site and PHP-FPM processes PHP requests successfully. |
| The public domain resolves to the new Droplet. |
| HTTPS works and certificate renewal is managed by Caddy. |
| Important pages, media, permalinks, forms, and administrative functions have been tested. |
| Email delivery, scheduled jobs, and external integrations have been verified. |
| Logs and server resource usage have been checked. |
| The old server is no longer publicly serving a vulnerable copy of the site. |